After many years of abuse, my old Shop-Vac was finally dying. So I bought a new one a decided to convert the old one into a dust collection bin. In this article I will show you the steps I took to create a dust collector that hooks up to the new Shop Vac.
Step 1: Prepare the old Shop-Vac
I removed the wheels
Cut-off the power cord
Covered all the holes with duct tape to create a vacuum.
Tried to remove the engine but in the end decided to keep it because it was i) difficult to remove and ii) it was connected to the output hole
Covering all the air leaks with duct tapeAll the air leaks are sealed with duct tape
Step 2: Assembly required
I used ABS tubes to merge the two Shop-Vacs together
ABS pipes needed to merge the two Shop-Vacs together
Step 3: Testing the system
Once I hooked up the two machines and turned on the new Shop-Vac, I noticed many air leaks in the old machine. So I covered up all the leaked with more duct tape
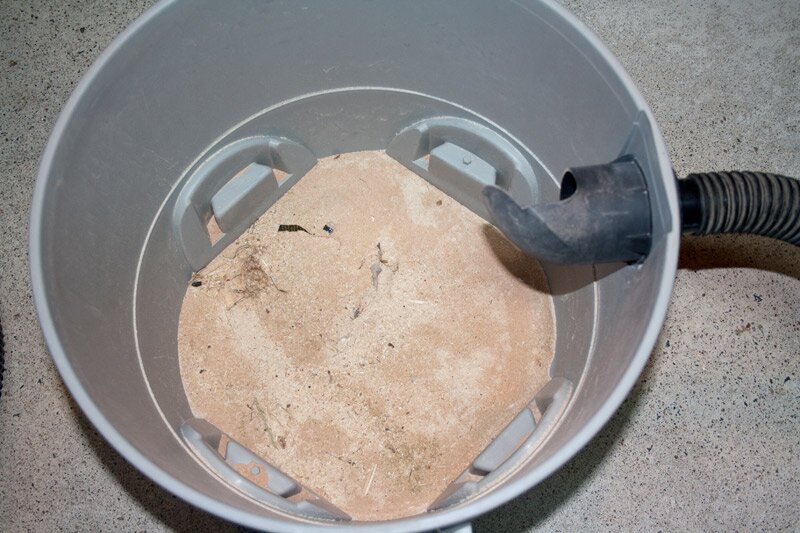
Tested the strength of the vacuum and the collection of dust
All works well
The new Shop-Vac creates a vacuum in the old Shop-VacTesting the strength of the vacuum with the dust collection binDust collection system working well
Download “The Book Of Guitar Building Jigs & Plans”
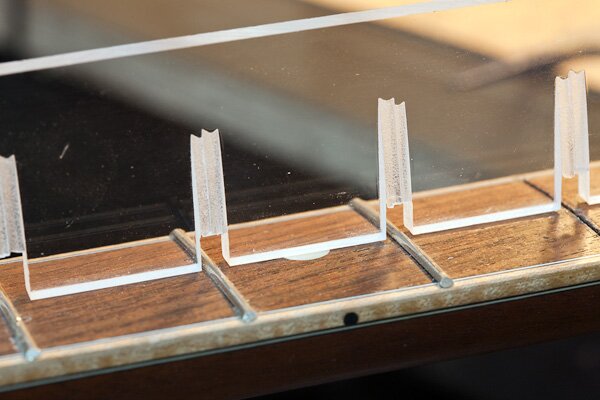
The notched straightedge from Stewart MacDonald is a highly regarded tool for checking the straightness of a guitar fingerboard. Made from machined stainless steal, this tool allows you to check the straightness of the fingerboard independently from the frets because the notches in the straightedge sit over the frets. The tools is rated as excellent (5/5 stars) from about 50 reviewers over at the stew-mac website (at the time of this writing). There is one drawback however, the price. At about $80 us, it’s not very affordable for a hobby guitar builder who only needs this tools once in a while. So I decided to replicate Stew-Mac’s notched straightedge tool and it only cost me about $1. I’ll show you how you can make one… Continue reading How To Make A Notched Straightedge Like Stewart MacDonald→
Download “The Book Of Guitar Building Jigs & Plans”
The Book Of Guitar Building Jigs & Plans
Important: Before starting to install the tune-o-matic bridge posts make sure the neck and fingerboard are in their final positions. The position of the bridge on the body is highly dependent on the fingerboard and the nut. Since the strings vibrate between the nut and the bridge (the scale length) and since the position of the nut is fixed, the exact position of the bridge will determine the correct scale length.
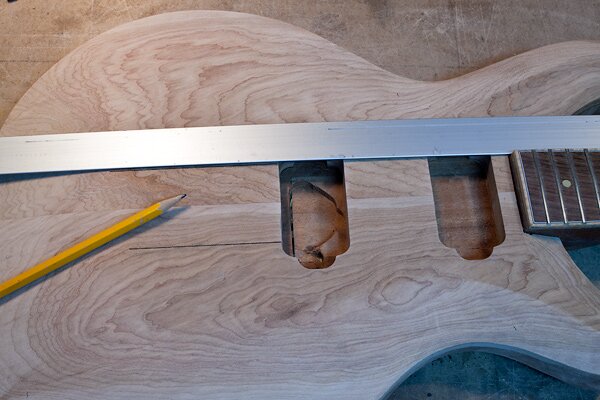
Step 1: Alignment. Place a long ruler along the side of the fingerboard and extend the ruler onto the guitar body. Then draw a line on the body. Do the same on the other side. You should end up with two lines that are extensions of the fingerboard (see image). The two lines should not be parallel to each other since the fingerboard is tapered.
(Note that in this case the body has not been finish-sanded yet so I’m not worried about pencil marks. If your guitar body is sanded to receive its varnish, then I suggest placing making tape on the body and drawing the lines on the tape.)
Draw two lines parallel to the fingerboard (line was made bolder in Photoshop)
Building Electric Guitars by Martin Koch (personal favourite)
Make Your Own Electric Guitar & Bass by Dennis Waring & David Raymond
Build Your Own Electric Guitar by Martin Oakham
How To Build Electric Guitars: The Complete Guide to Building and Setting Up Your Own Custom Guitar by Will Kelly & Lee Dickson
Electric Guitar and Bass Design: The Guitar Or Bass Of Your Dreams, From First Draft To The Complete Plan by Leonardo Lospennato, Ned Steinberger, R.M. Mottola, Claudio and Claudia Pagelli, Ralf Martens, Sebastien Heck & Martin Off
Electric Guitar Builders. This is an ever growing list, please tell me in the comments section who you would like to see added…
David Myka Custom Guitars, Seattle Washington
Potvin Guitars, Ottawa Canada
Nik Huber Guitars, Rodgau Germany
Kauer Guitars, Elk Grove California
Stevens Guitars, Alpine Texas
Cardinal Instruments, Austin Texas
Crimson Guitars, UK
??
Books about Electric Guitar Finishing
HOW TO Create A Factory Guitar Finish With Just A Couple Of Spray Cans!
HOW TO Paint Multi-Colored Stripes!
Guitar Finishing Step-by-Step
Inzane Decals
Virtual Guitar Building Engines
Bailey Builder
Kisekae Virtual
Design and Build Resources
Stewart MacDonald
Project Guitar Forum
Musical Instrument Makers Forum (MIMF)
Guitar ReRanch
Grid Line Generator (generate grid lines for printing)