For daily photo updates on my current builds, visit my Jakalian Guitars Facebook page
This will be a custom Telecaster build with the following specs:
- body: three-piece African mahogany
- top: book-matched Padouk with sapwood center
- neck: laminated, flamed maple / padouk / flamed maple
- fretboard: choice of bird’s eye maple, jacaranda, rosewood, etc. (12″ radius)
- 25.5″ scale length
- bridge pickup: DiMario The Chopper T™ Bridge with push-pull tone knob for coil splitting
- neck pickup: single coil
- black hardware: tuners, bridge, knobs, etc.

From left to right: African padouk (top), African mahogany (body), flamed maple (neck laminate), African padouk (neck laminate), jacaranda (fretboard), bird’s eye maple (fretboard)

I will make 2 book-matched tops from this piece of beautiful African Padauk.

The neck will be made from 2 pieces of flamed maple and 1 piece of padouk.

Closer look at the jacaranda and bird’s eye maple. Not sure which one to use yet…

Another look at the body and top.

Cutting the mahogany into 3 pieces on the miter saw.

The three mahogany pieces that will form the body

Cleaning the edges for jointing

Gluing and clamping the mahogany pieces

The mahogany body blank is ready

This padauk blank was too big for my band saw so I had to remove 1″ from it


Bookmatched padauk

Then I resawed each side into a set of 2 bookmatched tops

The outline of the telecaster shape is added in Photoshop to get an idea of what it will look like… Looks good!

Planing the boards using my new planer. This thing is saving me so much time and frustration, I’m really liking it so far 🙂

Before and after planing

Closer look at before planing… you can see all the band saw marks

Closer look at after planing… clean, flat and smooth.
Now comes the difficult part… which combination of bookmatch and fretboard?

One: White sapwood stripe with bird’eye maple fretboard?

Two: White sapwood stripe with jacaranda fretboard?

Three: White sapwood stripe with rosewood fretboard?

Four: All-red top with bird’s eye maple fretboard?

Five: All-red top with jacaranda fretboard?

Six: All-red top with rosewood fretboard?

The pieces for the laminated neck: figured maple, padouk and another figured maple

Cut them to strips

Dry fitting the neck laminates… looking good!

Preparing to glue the 5-piece neck laminate

Glue drying

Trimming a few inches of excess from each end

5-piece laminated neck blank is ready. I should be able to get two necks from this.

Cutting the neck blank in two two pieces on the bandsaw

The neck blank is cut into 2 pieces

The inside of the cut is very rough with band saw marks

Cleaning those faces on the planer

Two nice, clean, quatersawn neck blanks… did I say how much I like this planer!? 🙂

The bird’s eye maple fingerboard blank

A 3/8″ piece is ripped off on the band saw

Passing it through the planer

Fingerboard blank

The neck and fingerboard blanks

Planing the mahogany body

The body is flat

Time to take it to the band saw and cut out the rough Telecaster shape

The Telecaster mahogany body

The collection of guitar parts so far

I’m using the Mike Potvin Telecaster template

First pass with a flush trim router bit. I usually use a much longer bit and route the shape in one pass but this time I chose to use a smaller bit and take two passes. It takes more time but put less stress on the router bit.

Guitar shape routed

The mahogany body weighs 4.3 lbs, a bit too heavy since a top will be added.

Reducing the weight by adding weight-relief cavities.

Weight reduced to about 4 lbs. Even though the difference is only 0.3 lbs, you can definitely feel it.

The padouk top has been jointed and glue is now drying.

The top after glue has dried and the body

Tracing a double line. I’m using a fairly large nut in order to get a fairly distant double line that will make it easier during glue up

The top before being cut on the band saw

The top after being cut on the band saw. It’s starting to take shape!

The body and top

Cleaning up the glue surface with some low grit sandpaper

Top, body and my newly-made clamps ready for gluing

Glue applied to top and body

This is a new clamping system I came up with to glue guitar tops.

Guitar clamps, side view. I will let this dry for about 24 hours.

The body is out of the clamps and I’m trimming off, carefully, some excess padouk so that the router does not have to remove it.

Flush trim router to clean the edges on the router table with the template

Oscillating spindle sander to sand the edges and remove the router marks

Passing the body through the planer to clean up and level the top

The body so far with indoor fluorescent light

The body so far with outdoor daylight

Drilling out most of the wood from the pickup cavities with the Forstener bit on the drill press

Removed the bulk of the wood with a Forstener bit before using the router

Routing the pickup and electronics cavities with the template as a guide

The pickup and electronics cavities are routed. Looking good.

Round over router bit

The edges of the back side are rounded over

The body so far…

Drawing the back side belly curve

Rough carving the belly contour with a sanding disk on the drill

Finer sanding the belly contour with sandpaper rolled on a tube

The belly contour nearly finished

A view of the tummy contour from the side

Drilling holes for the wires, from the pickup cavities to the electronics cavity. I feel like a surgeon performing an operation 🙂

Cutting off excess from one side of the headstock

After jointing the edges, the headstock extension is glued on

The headstock extension. The pencil outline is not the final shape of the headstock, it’s just a temporary shape.

A look down the length of the neck

Cutting excess material from the sides of the neck on the band saw. I’m not shaping the headstock yet.

Cutting the fret slots on the miter box and the 25.5″ template underneath

A closer look at cutting the fret slots on this Bird’s eye maple

All the fret slots are cut

Making the groove for the nut (thanks to my wife for taking the photo 🙂

The groove for the nut is complete

Bird’s eye maple fretboard slotted and wiped with some mineral spirit

Trimming off excess material from the fretboard edges and bringing it closer to its final dimension

Making the neck and headstock template

Tracing the neck template on the neck

Band sawing out the rough neck shape

Flush trim routing the neck on the router table with the template underneath

After routing out the neck shape

The fretboard and neck so far

Temporarily clamping the neck to the body… it’s starting to look like a guitar
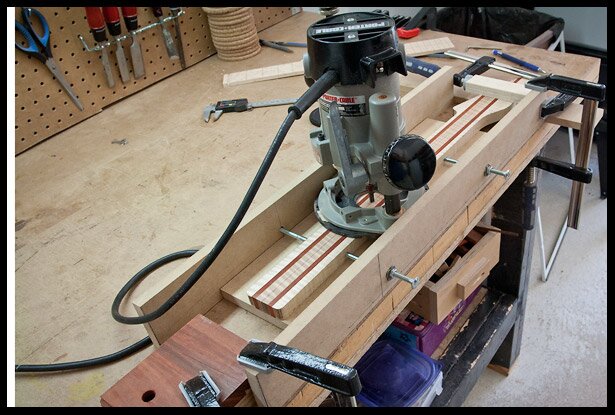
Setting up the truss rod channel routing jig with stops at the back and front
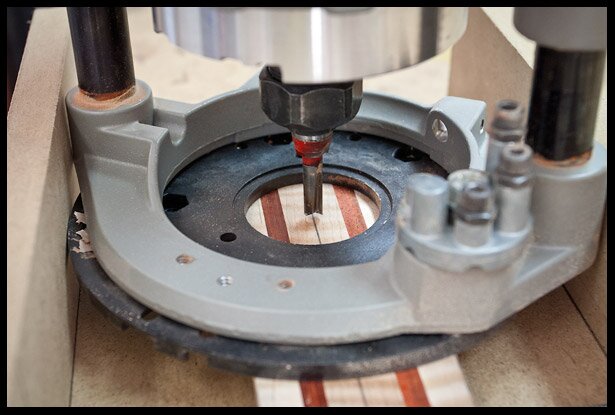
Centering the neck under the router bit

Before…
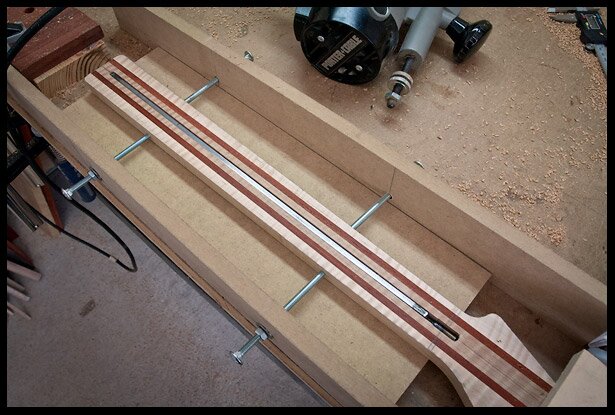
… after. The truss rod fits nice and tight.

Truss rod in the channel
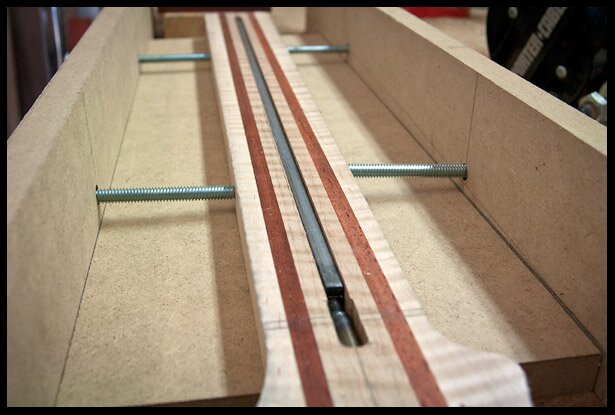
Truss rod in channel

Drilling the tuner holes on the drill press

Tuner holes drilled

Cutting the perpendicular line on the headstock

Shimming the neck to cut parallel to that line on the band saw

Headstock thicknessed down
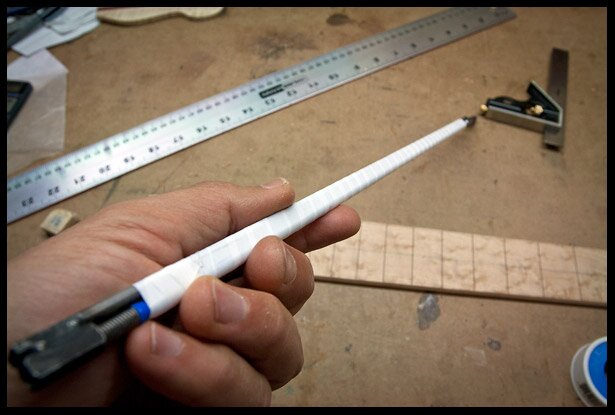
Wrapping the truss rod with Teflon tape so it won’t rattle in the neck when not the truss rod is not tightened
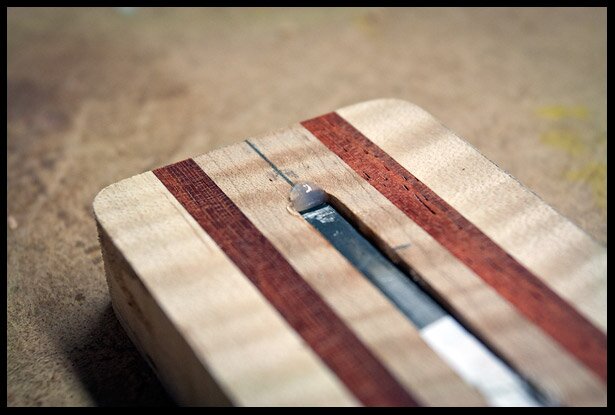
A bit of silicon to hold it in place firmly
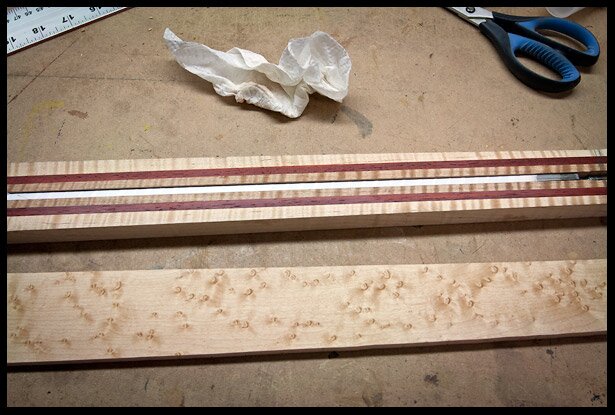
Clean both surfaces with some mineral spirit or acetone to have a good bond
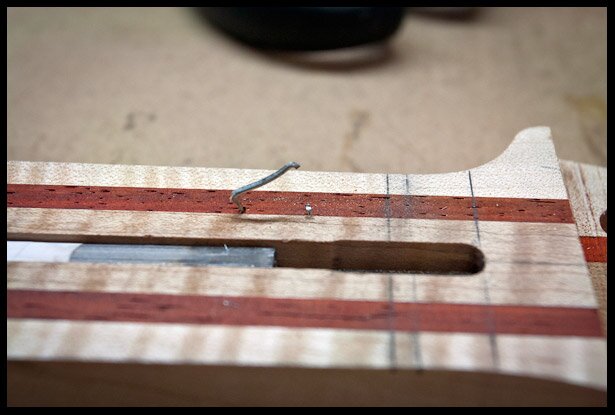
Making a locator pin for fretboard placement
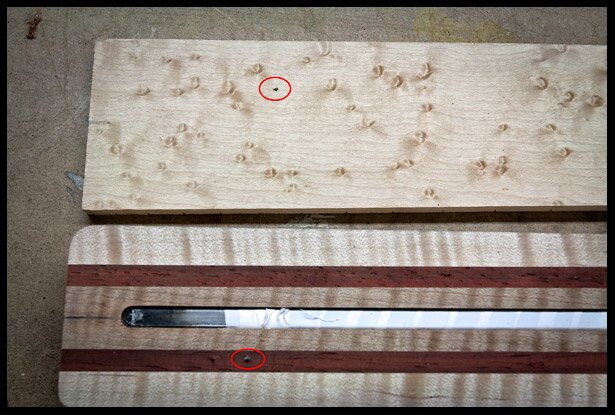
The locator pin and the equivalent hole on the fretboard
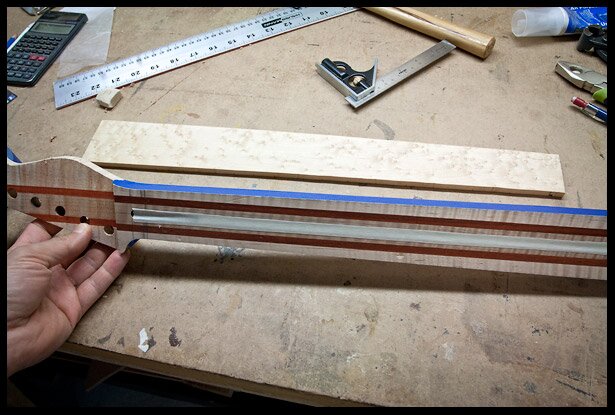
Place masking tape over the truss rod channel and the sides of the neck
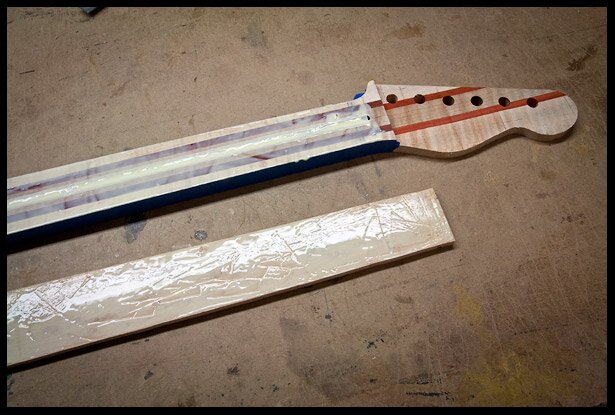
Apply glue to both faces
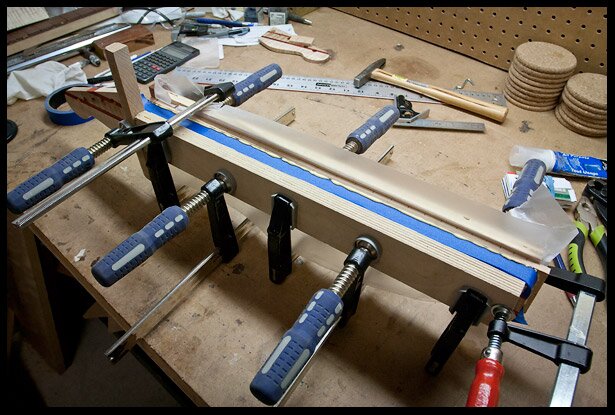
Clamp the fretboard to the neck using cauls
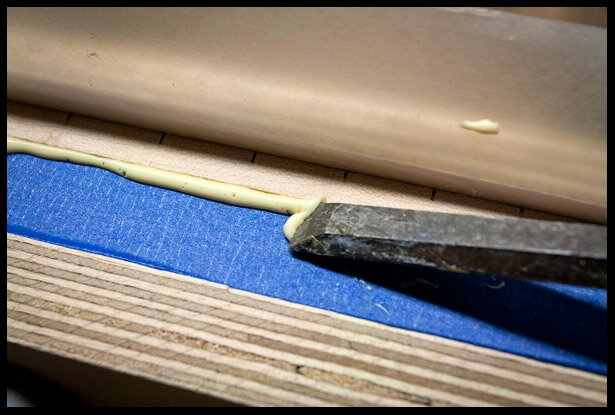
Clean the glue squeeze out when the glue is a bit dry
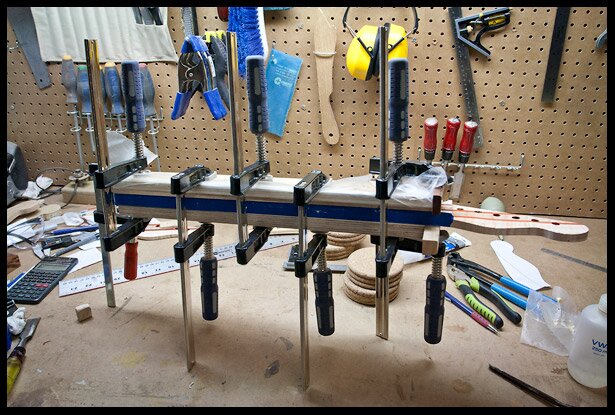
Let glue cure overnight
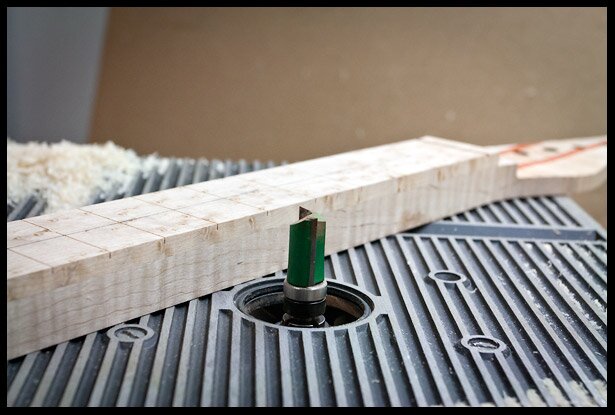
Once out of the clamps, route the fretboard flush with the neck
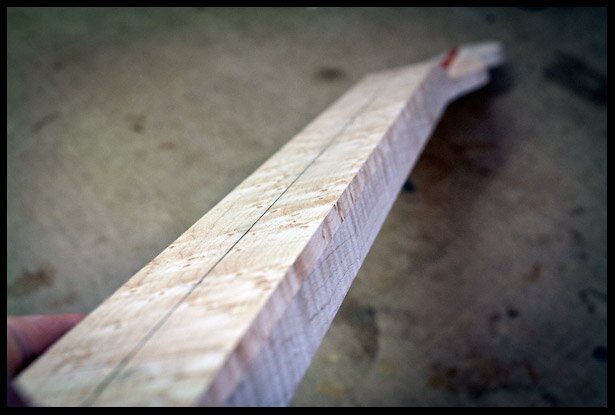
A look at the neck so far

Reducing the thickness of the headstock

Closeup view of the headstock

Making sure the headstock is ready for the veneer and labeling the neck with some useful information

The headstock veneer blank

Gluing the headstock veneer blank

Flattening the bottom of the headstock veneer

The headstock veneer is glued on and a opening is made for access to the truss rod

The top piece of the headstock veneer is glued on

In the process of cleaning up the headstock veneer

The headstock veneer transformation is complete

The guitar so far

The guitar so far

Drawing reference lines for carving on the back of the headstock and neck

Starting to carve the back of the neck with a spokeshave

Making some progress on caving the back of the guitar neck

The shape on the back of the headstock

Making sure that the back of the neck is straight

The neck carving is about 90% completed, just need to clean up some areas.

A look at the back of the neck carving, about 90% completed.

Another look at the neck

Making dot inlays from ebony using a plug cutter

Testing positions of dot inlays before committing to this pattern

Drilling inlay holes on the drill press

Gluing the ebony dot inlays

After glue is dry, trimming off the tops

All the tops are cut off

After sanding the ebony dots inlays flush with the fretboard and wiping with some mineral spirit

The ebony dot inlays are done

A closer look

Even closer look

I built a new radiusing jig that works for both making a radiusing block and when flipped, will also radius a fretboard

The newly-made 12″ radiusing block

Stick some 60 grit sandpaper to the radiusing block

The fretboard before radiusing

After about 45 minutes, this dust pattern reveals that the fretboard now has a 12″ radius

The fretbloard after rough radiusing

The fretboard after fine sanding

I decided to round over the neck heel

Temporarily installing tuners to get the location of the screws

A first look at the headstock with the tuners

Removing the tangs from the fretwires

First I hammer the fret into the slots 2 to 3 at a time and then clamp them for 5 minutes

Beveling the edges of the frets with a home-made 25 degree beveling block that hold a file

Taping the fretboard before leveling the frets with the home-made leveling beam and some 220 grit sandpaper

Polishing the frets with some car polish. The 3 frets to the left of the center fret are polished.

The frets are done!

Removing wood from neck pocket on Forstener bit drill press

Aligning the neck pocket template and then routing the pocket to the right depth

Neck pocket carved

Checking neck pocket alignment with a laser. It’s dead on!

Neck pickup mock up

Mock up of the guitar with hardware

Another look of the mock up of the guitar with hardware

Clamped on the drill press about to drill the jack hole

Jack hole drilled on the drill press

Carving a small round over by hand
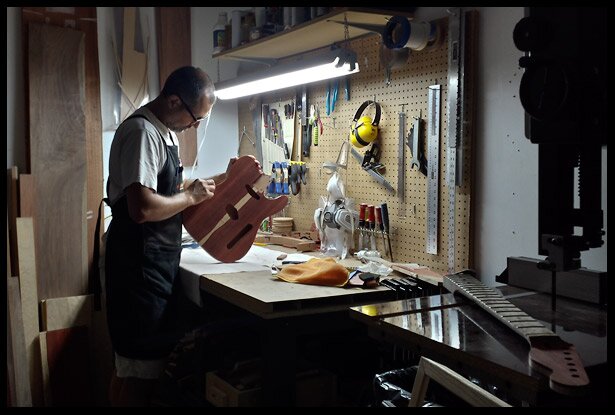
Me working on the guitar (photo courtesy of my daughter 🙂

About to start finish-sanding

A quick setup to check bridge, neck and string alignments

Checking alignments… looks great!

Testing intended finish method on a test piece. It consists of thin coats of epoxy to fill the deep padauk pores and provide a flat surface for the hand-rubbed, home-brewed polyurethane/mineral spirit solution.

Gloss look after a small amount of buffing. The guitar will have many more coats of polyuerthane and will have a much better buff job. But the owner and I are happy with the overall result on the test piece.

After hours of final sanding, one last wipe with mineral spirit to remove dust. I think Dora approves! 🙂

Adding grain filler to the mahogany

Grain filler drying in the sun

The pores are filled and the surface is smooth after the grain filler

Wipe-on the polyurethane, wet. Starting to build the layers of poly.

Wipe-off the polyurethane, dry

Polyurethane drying

Polyurethane drying closer look. There’s still a lot of “orange peel”, I will get rid of that at a later stage. Right now, I’m still building up the layers of clear.

Layering up the layers of polyurethane on th back

Reflection on the clear coats.
Carving the headstock logo on the cnc (click the link to watch a 10 sec video)

Filling the logo with black epoxy

Carved the cavity in the headstock

Glue the inlay in the cavity

Another look at the clear coat, still needs to be wet-sanded and buffed

As I was applying the finish on the neck, I noticed that I still had the original pieces of wood and an extra neck blank, so I took a photo with all three.

Applying Tru-Oil to the neck

Tru-Oil and wax applied

A look at the back of the neck with Tru-Oil and wax applied
Customer fender-style guitar neck made from figured maple and padouk. #luthiery #guitarbuilding #guitarmaker #guitarmaking #woodworking #woodwork #whatsonthebench #padouk #padauk #figuredmaple #maple #telecaster #mtl #woodporn #uniqueguitars #boutiqueguitars #madeincanada

After the polyurethane has had enough time to properly cure, it’s time to sand the top layer to remove the orange peel.

After many hours of buffing

Applying the final buffing compound

All the buffing is finally done!
Final buffing with Swirl Remover. #twitter #luthier #luthiery #guitarbuilding #guitarmaker #guitarbuilder #whatsonthebench #handmade #handmadeguitar #woodworking #woodwork #customguitar #uniqueguitars #boutiqueguitars #telecaster #madeincanada #padouk #padauk #mtl #guitarporn
Buffing is finally done!! #twitter #luthier #guitarmaker #guitarbuild #woodwork #woodworking #handmadeguitar #handmade #customguitar #uniqueguitars #boutiqueguitars #telecaster #madeincanada #padouk #padauk #mtl #guitarporn #telecaster

My friend Tom wiring the electronics

Drilling the holes on the neck heel

After careful alignment, the neck is screwed in

Installing strings!

Almost all the hardware is installed. Next step is set-up.

Testing the guitar on a Fender Blues Deluxe Reverb. No it’s not my amp, … I wish 🙂
Vanity Photos


En route to the owner…


HI, i am Vladimir from Montenegro ( ex Yugoslavia ). I am building my first guitar, telecaster. The neck will be the same as this on the pictures. Can you tell me what is the thickness of the parts you used to build the neck for telecaster?
Thank you!
Hi Vladimir, The thickness of the neck blank is 0.75″ (1.9 cm) and the fretboard is 0.25″ (0.64 cm). Feel free to join the Project Electric Guitar Facebook group, there are many new guitar builders but also many experienced, knowledgeable and friendly people to help with questions if you get stuck… https://www.facebook.com/groups/ProjectElectricGuitar/
Take care, Araz